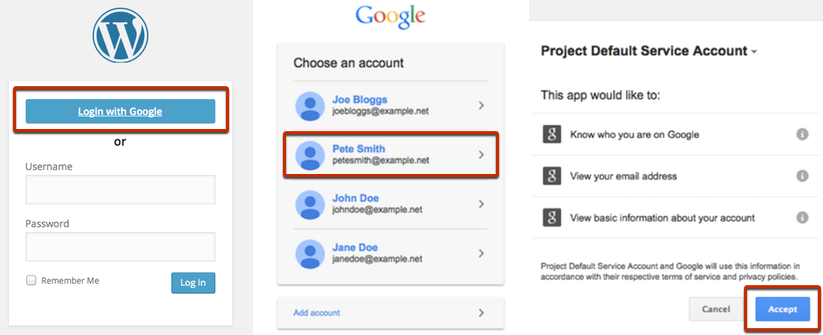
These instructions presume you are using the Enterprise version of Google Drive Embedder and have already installed successfully, including installation and configuration of either the free, premium, or enterprise Google Apps Login plugin which is required for the Drive plugin to work.
To get the full benefit of Enterprise Drive features, including Attachment Folders and Controlled Folders, you will also need to configure a Service Account via the Google Apps Login plugin. See instructions here.
Introduction
Google Drive is a versatile way to store files and share with colleagues, while your intranet is clearer and better structured for sharing more focused information.
Wouldn’t it be great if your intranet could be used to control and structure the information your organization stores in Drive?
Our Enterprise version of Google Drive Embedder integrates Drive much more closely with your WordPress site, essentially allowing each page or post on your intranet/site to host its own file attachments, completely backed by Drive.
This means you no longer need to manage Drive and your Intranet as two completely separate document sharing systems!
You can also use the plugin to embed interactive Drive folders on any website, so viewers can browse and preview files without leaving your site.
License
In Settings -> Google Drive Embedder (within your WordPress admin panel), click on the License tab. Enter the license key from your purchase email. This will enable automatic update notifications of any future versions of the plugin.
Setup
The advanced Enterprise Drive features require a special Drive folder to be created at the top level of your Drive account. This is the base folder of your ‘Drive hierarchy’ – a tree of folders that will mirror the hierarchy of your WordPress site, so every page/post on your site has a corresponding folder in this Drive structure.
To initialize the ‘Drive hierarchy’ you need to create or choose a ‘base folder’ which should be at the top level of your Drive account. In the Setup tab, you have the opportunity to either create a new Drive folder, or pick an existing top-level Drive folder. In either case, you can choose for the folder to be on the ‘My Drive’ of your admin user, or on a Team Drive to which they have access.
For this to work, you will need to have configured a Service Account via the Google Apps Login plugin. See instructions here.

Click Save Changes to actually create or pick the folder, and then you should see that folder active as your ‘base folder’ – like this:

Once selected, you should not need to change this folder.
Folder Controls
Click the Folder Controls tab.

Page/Post Attachment Folders
If you check the box ‘Automatically append attachments folder on post’ then a Drive folder will be created by default on every post in your site. The folder, named after the post it’s related to, will be created within the Drive hierarchy you set in the ‘Setup’ tab. The folder contents (empty to start with) will appear in a box beneath the post when it is viewed on your published post. Your users can share files by dragging them into the box (depending on permissions – explained later).
If this option is checked, go to a post and you should see a Drive Attachment section at the bottom – where your users can share files with each other (if they have permissions, of course).

Try dragging a file over that section and see if it will upload for you. Then go to the folder in Drive and see the file there.
The great thing about Drive is that files can be in multiple folders at once. So files stored elsewhere in Drive can also be attached to the WordPress folder’s hierarchy and appear at the bottom of relevant pages/posts without needing to be uploaded separately into WordPress.
There is a separate checkbox in Settings allowing you to add an Attachment Folder to every page (instead of or as well as every post). There will be checkbox for any custom types you might have on your site too.
It is possible to override the auto-attachment settings here on any individual page/post. As an admin, you will see an option within the post editor allowing you to turn the Attachment Folder on/off regardless of the default setting you make in the Settings panel.
If the post author is not an admin, then they will only be able to override the setting if you check ‘Allow content authors to override the above attachment folder auto-append settings’ in the Settings panel.
You can find out more about Attachment Folders in our tutorials section.
Default Folder Permissions
The permissions section allows you to specify the global site-wide permissions for Controlled Folders and Attachment Folders. These are what ‘default’ refers to if you embed a Controlled Folder. These permissions will apply to Attachment Folders unless you override on an individual post/page basis.
Controlled Folders are a way to embed a Drive folder in your site such that the file listing is proxied via your Service Account so viewers don’t need their own Drive account to view it.
The basic permission options are Always, Drive, and Never. And these can be specified for each functionality: ‘View’ existing files and ‘Upload’ new files.
- Always means that users will be able to perform that action by using the Service Account – meaning they don’t even need to have a Google account themselves at all! This way you can allow users to view folders (and even upload files) to a folder that they wouldn’t otherwise have permissions to access at all.
- Drive will defer to the permissions of their Google Drive account, requiring them to e.g. login to Google to view your folder – and of course only be able to see files if they have been given access in Drive itself
- Never – means they won’t be given the opportunity to perform the action at all, via the Service Account or even via their Drive account. However, please note that if they do actually have permission to e.g. view or upload to the Drive folder directly, then they could always just go to Drive to perform the action there instead.
To start with (if all dropdowns are set to Drive), all users will be required to use their Drive account to view or upload to folders. That means you may need to ensure your users have appropriate Drive sharing settings to the base folder you set up a minute ago. Or you can use Always and Never as defaults for any action – Always uses the Service Account for an action (i.e. view or upload) regardless of whether that user has a Drive account or not.
You can specify how view/upload is performed for two different categories of user to start with: Logged-in Users and Visitors (people who aren’t currently logged in to the site). You can also click ‘Add Role’ to add an extra row of permissions that should apply to users of a particular role in WordPress (e.g. Admin or Editor).
These settings should hopefully make more sense if you try our tutorials and start embedding folders in your site!
For Attachment Folders and Controlled Folders, as an admin user you can always override the permissions on a per-folder basis. Controlled Folders can be set up to follow permissions other the ‘default’ when they are created, or you can edit them afterwards through the Controlled Folder section in your top-level WordPress admin (it should appear somewhere below the main Settings menu, but at the same top level as Settings itself).
Attachment Folder permissions can be edited in a special box that appears on every page/post – provided you are an admin. The box will appear for anyone editing the page/post, but only if you have checked the box ‘Allow content authors to override attachment folder permissions’ on the Folder Controls tab of the Settings -> Google Drive Embedder page.
Drive Ownership
Click the Drive Ownership tab. Most users will be happy with the default settings of all three checkboxes on this page being unchecked, so feel free to move on to trying out the plugin now, following our tutorials.

As you can read on the tab itself: Google Drive Embedder can use your Service Account to change ownership and parent folders of files/folders that are used within your WordPress site. This can help you keep track of which files and folders in Drive are relevant to your site, and to ensure a senior admin owns all such files/folders.
Set post/page author as writer of Attachment Folder when folder is auto-created in Drive
If checked, every time a folder is created in your Drive hierarchy – corresponding to a page or post – the plugin will attempt to set the owner of the folder to the same user named as an author of the WordPress page/post. This only happens when the folder is created. If the WordPress post’s owner changes, the folder will not be updated to the new owner in Drive.
Embedded files/folders should become owned by Service Account admin in Drive (original owner becomes writer)
If checked, then whenever a post author uses Add Google File to embed a file or folder in the post, the plugin will change the owner of the file/folder to the Google Apps domain admin named in the Service Account settings. The original owner of the file will become a writer. There is a mechanism in the Add Google File dialog box to ensure the author is aware of this change of ownership.
Embedded files/folders should have the page/post Attachment Folder added as a parent in Drive
If checked, then whenever a post author uses Add Google File to embed a file or folder in the post, the plugin will add the file/folder to the Attachment Folder corresponding to the post (i.e. the Attachment Folder will become a parent of the file). This is regardless of where the file currently resides, and will not affect any existing parent relationships of the file (Drive files can have multiple parent folders). Please note that Attachment Folders can exist even if they are not visible on the post itself when viewed.
In all the above options, the results may vary (or not work at all) depending on Drive permissions applied to the files being embedded.
Advanced Options
The Advanced Options tab only contains one option in the Enterprise version, and it will not be useful for most installations, so feel free to move on to our tutorials explaining how to use the product.

When embedding a document into a WordPress post via Add Google File, the default behavior for the plugin to decide from which Google account to pull the file list runs as follows: Attempt to pick the Google account corresponding to the currently logged-in WordPress user’s WordPress email address.
You can check the setting called ‘Allow user to choose Google Account independently of WordPress email’. This will cause the plugin to show Drive files from whichever Google account happens to be logged into the browser. If no Google account is logged in, it will allow you to choose any account to connect. If more than one Google account is logged in, you will be able to select which account you wish to use (or login to yet another Google account).
If the checkbox is unchecked, the default behavior will apply – the plugin will always try to show the Drive account belonging to the WordPress user’s email address.