No Google Acct
I don’t want users to need their own Google account to view folders – they keep being asked to authorize
(Enterprise version of Google Drive Embedder)
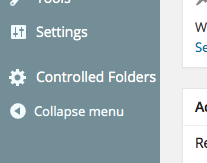
It sounds like you have embedded the folder as a ‘Quick Folder’, and that does require the user to have their own Google account in order to view. Instead you need to use ‘Controlled Folders’ with View permissions set to ‘Always’ within the plugin. This uses the Service Account behind the scenes instead of the user’s own Google account.
There are more details about Controlled Folders etc in our docs here. And if you first need to configure a Service Account, instructions are here.
And this is a quick guide to what you need to change:
In Settings -> Google Drive Embedder, go to the Folder Controls tab.
Under the ‘Default Folder Permissions’ section, change the ‘View’ column of dropdowns to ‘Always’ as follows:
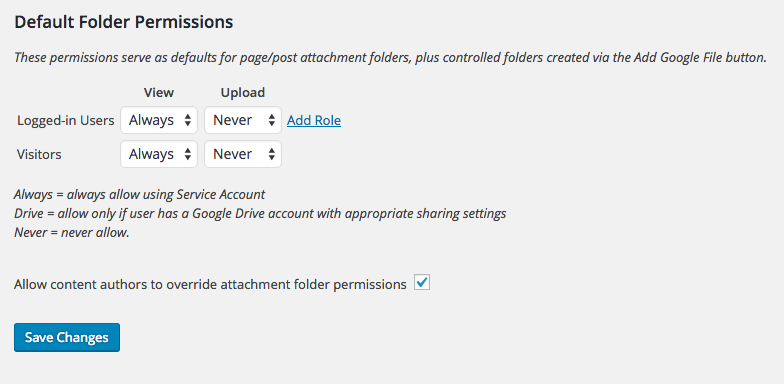
The ‘Upload’ column should be set to ‘Never’.
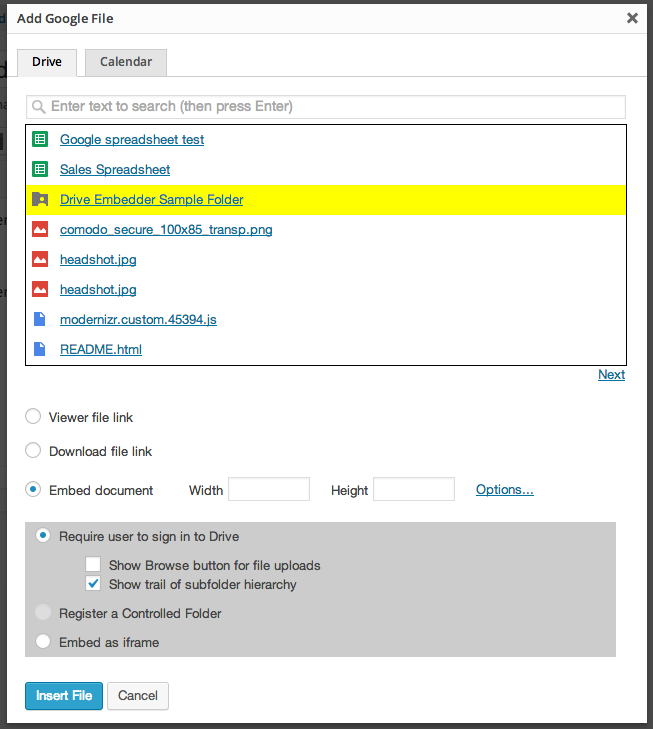
Next, you need to embed the folders again using the Add Google File button. This time, expand the Options area before you insert the file, and select ‘Register a Controlled Folder’ as follows:
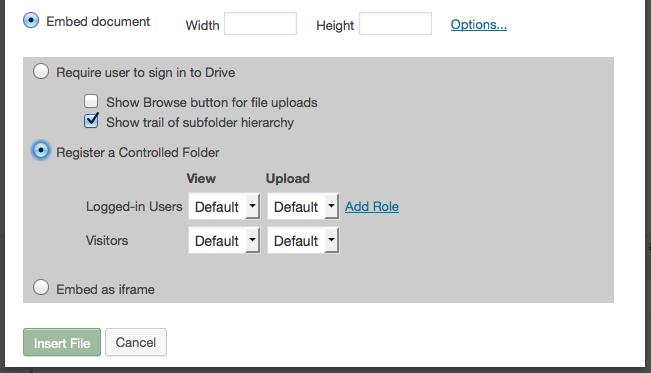
You can leave these dropdowns as ‘Default’ and it will pick up the new ‘Always’ defaults that you just set in the Settings page. Alternatively, you could change the View column to ‘Always’ here instead, but of course you would need to do that for every folder that you embed. That’s why I suggest changing the default permissions in settings.
The shortcodes should now look something like this instead:
[google-drive-folder cfid="125" title="The Folder"]
Controlled Folders use “cfid” instead of the Drive “id” in the shortcode – that’s how you can see the difference by looking at the shortcode alone.
Please note, it still also makes sense to share the folder/files as ‘Anyone with the link can view’ in Drive itself, so users can view the files themselves. The above ‘Controlled Folder’ takes care of viewing the file listings only.
Invalid Scope
Invalid Scope – 400 error
When you click ‘Add Google File’, or attempt to authorize with Google, you just see a window saying ‘400 – That’s an error. invalid_scope’:
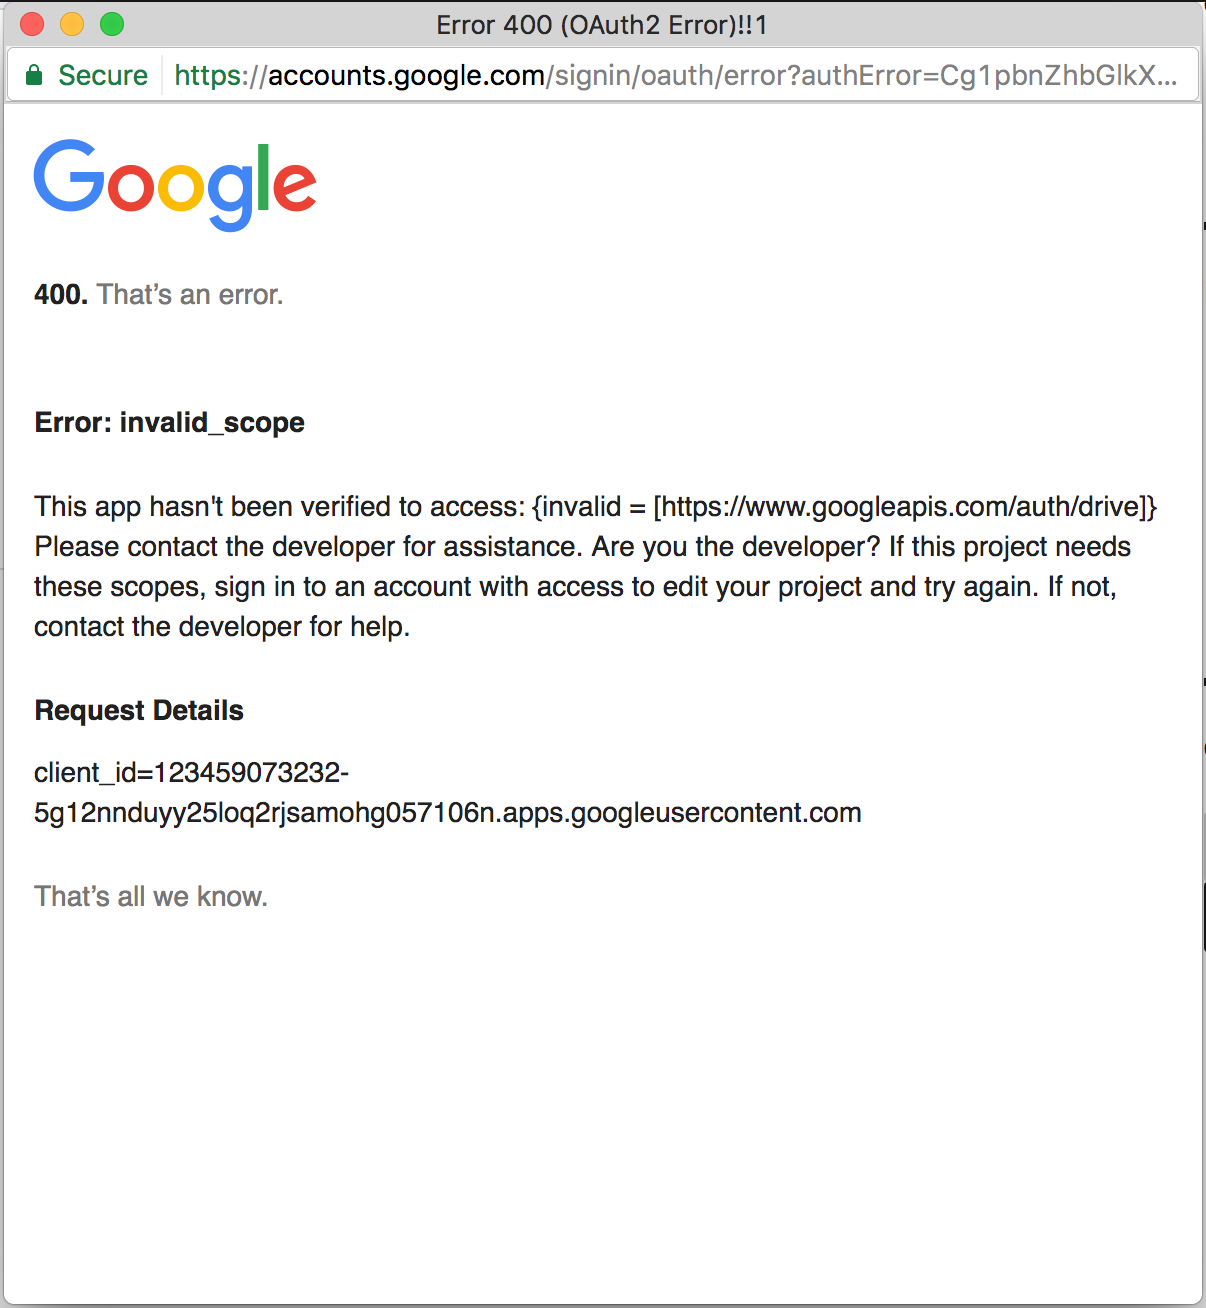
You probably created the project using a free Google account (or free educational/non-profit G Suite) rather than a paid G Suite (Google Apps) account. That’s fine, but Google has an approval process in place to prevent phishers from setting up false projects. (Please get in touch if you didn’t use a free Gmail account, but still see this error.)
First, for testing purposes, you can ensure your own account is whitelisted so that you can try it out without formally submitting your project for approval.
Simply join the Google Group: Risky Access By Unreviewed Apps
Once you are a member of that Group, you should no longer see the invalid_scope error, and everything should work as expected. That may be sufficient for your site if only you need access to ‘Add Google File’, and you don’t have any Enterprise-style folders embedded in Drive mode (you can find this out just by seeing if users run into the invalid_scope issue).
Submitting your project for Google Approval
For all users to be able to authenticate with Google for Drive purposes, you will need to complete the following form for manual approval:
https://support.google.com/code/contact/oauth_app_verification
Note that you will need to resubmit your project for approval if you change URL details or the site name, such as upgrading from http to https or moving your site to a new domain, so it makes sense to ensure everything is working first, using the testing procedure outlined above.
Some pointers to help you fill in the form
Our Unverified App instructions will explain how to fill in this form.
Please get in touch if you need any assistance.
G Suite – new API whitelist controls
It is now possible for a G Suite (Google Apps) domain admin to explicitly whitelist apps so all their domain users can use them. It is also possible to manage which scopes can be granted for apps.
Details are on Google’s blog. Please note these protections are in addition to the verification process described above. You may need to both submit your project for approval and whitelist your project for your domain (if your domain defaults are too restrictive in the scopes you allow your users to grant).
Unverified App
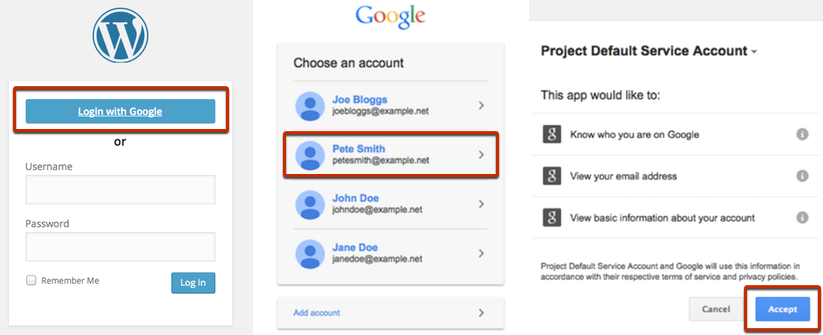
When you first configure Google Drive Embedder, users may face the following screen when they attempt to ‘Add Google File’:
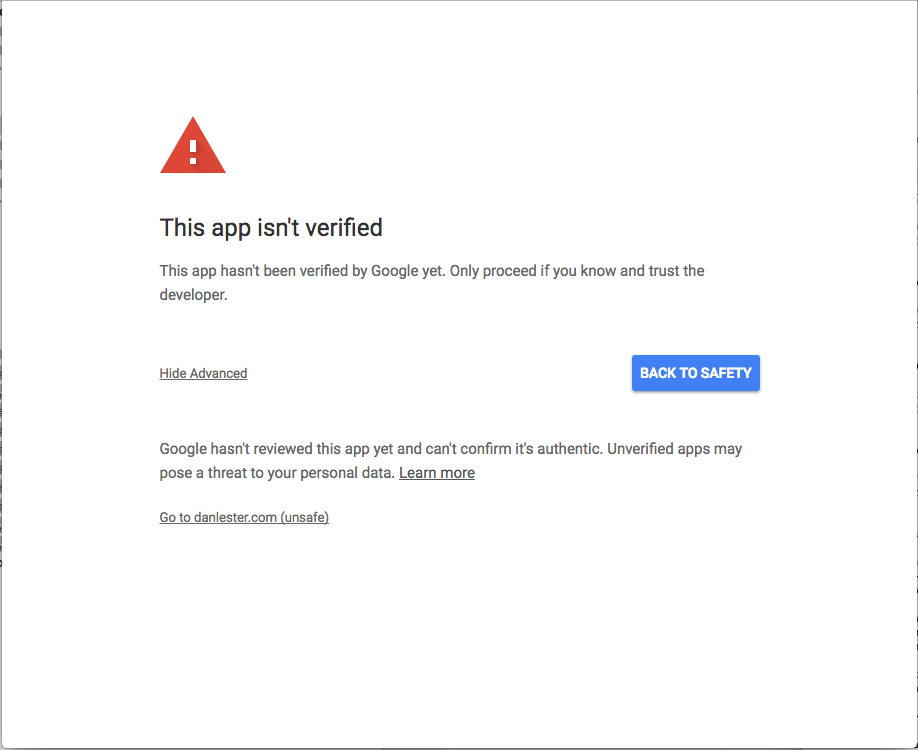
This is due to Google’s attempts to reduce malicious third-party applications. You can continue to test the app by clicking ‘Show Advanced’ and then ‘Go to site (unsafe)’. Your users can also do the same.
Most well-established G Suite domains should not face this check, but Gmail and free accounts especially may be required to submit their app for verification.
You can see Google’s instructions for submitting your app.
Note that you will need to resubmit your project for approval if you change URL details or the site name, such as upgrading from http to https or moving your site to a new domain, so it makes sense to ensure everything is working first, using the testing procedure outlined above.
Some pointers to help you fill in the form
Most of the relevant information can be found in the Google Developers Console project you set up to configure Google Apps Login.
Under API Manager > Credentials
Within the first Credentials tab, under OAuth 2.0 client IDs tab, click into the ‘Web application’ that you set up, probably called ‘Web Client 1’:
OAuth Client ID – this is the Client ID at the top of the screen, looks something like 123124125-g6lo114bkkqere6k0d6ktrvi5k.apps.googleusercontent.com. This is what you copied into the Settings -> Google Apps Login page in WordPress.
Within the second OAuth consent screen tab:
Product name that will appear on the scope consent screen – this is what you typed in the ‘Product name shown to users’ box.
In the very top bar of the Google Developers Console screen, there is a ‘three dots’ menu towards the right hand side of the screen. In that menu, select Project Settings. This will display a page including the ‘Project ID’ which is what you should enter in the ‘Project ID’ field of the verification form:
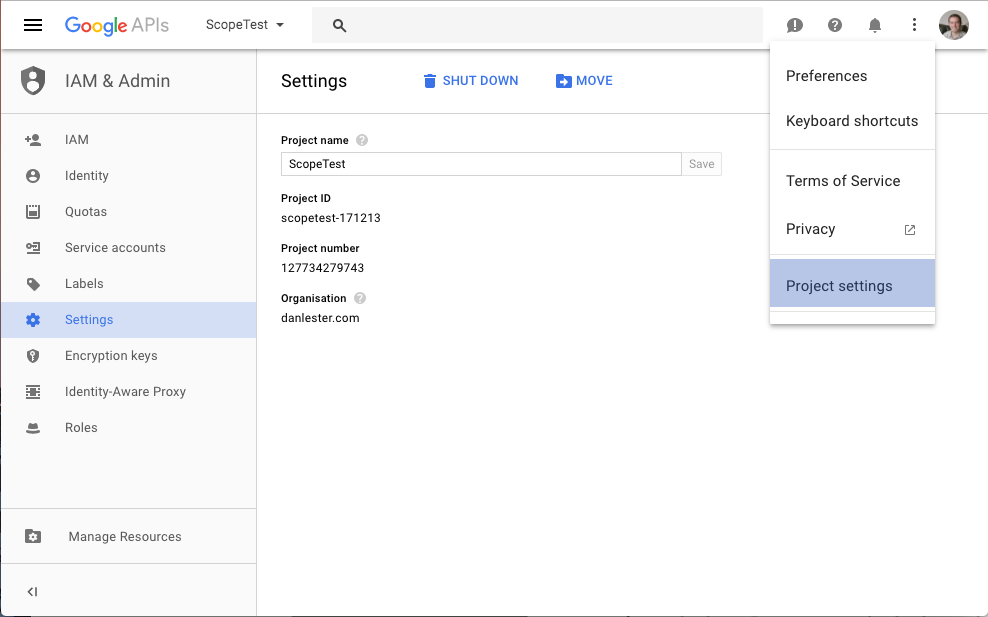
Project ID – this is the Project ID obtained as described just above.
Link to your privacy policy – this should be some simple privacy policy text on your site, which you probably need in place anyway, explaining what you will do with the user’s data. An example on our site is here.
What scopes does your app need to access? – “https://www.googleapis.com/auth/drive.readonly, https://www.googleapis.com/auth/drive, https://www.googleapis.com/auth/calendar.readonly”
List the specific ways your app will use each of the scopes you’re testing – “My app will use https://www.googleapis.com/auth/drive to display a list of the user’s Drive files allowing them to select for display within the website; and https://www.googleapis.com/auth/calendar.readonly to select from a list of their calendars to be embedded in the website; both will be available through the ‘Add Google File’ button in the page editor. It will use https://www.googleapis.com/auth/drive to display embedded folders within the site and allow the user to drag-and-drop files to upload.”
Please get in touch if you need any assistance or have anything unusual to report.
Troubleshooting
In the Add Google File dialog box, I just get the Google Error “Forbidden”
First, are you sure you followed all configuration instructions of the Google Apps Login plugin, including enabling Drive API…?
Google Apps’ user and permissions systems are complex, and there are many ways you could unintentionally forbid your users from using the Drive API.
You could have disabled API access completely, so take a look in your Google Apps admin panel and look for anything obvious.
One reason a lot have people have seen ‘forbidden’ in the past is because they have the following setting unchecked: go to Google Apps -> Drive, and then General Settings -> Allow users to install Google Drive apps.
After changing settings, you should logout of WordPress and Google, then refresh and try all over again.
Unverified App
When you first configure Google Drive Embedder, users may face the following screen when they attempt to ‘Add Google File’:
This is due to Google’s attempts to reduce malicious third-party applications. Please see further Unverified App details here.
Invalid Scope – 400 error
When you click ‘Add Google File’, or attempt to authorize with Google, you just see a window saying ‘400 – That’s an error. invalid_scope’:
Please see our invalid_scope instructions here.
In the Add Google File dialog box, I just see “Loading…”
If the plugin configuration is correct, most likely your site has opened another browser window in which it needs you to login to your Google account or confirm you grant permissions for the site to access your Drive account. So the first step is to double-check for that second browser window and follow the instructions there.
Otherwise, there may be a plugin configuration issue or a Javascript conflict.
Open your browser’s Developer Tools. If the Console tab has any red error messages, this may indicate a Javascript problem on your site – possibly from another plugin/theme, but which prevents any further Javascript from running (including the Add Google File dialog). You could try deactivating all other plugins and switching to a default theme to see if that helps track down the culprit. If in doubt, please contact support or try out the following possibility.
With your browser’s Developer Tools already open, reload the page and click the Network tab. Are there any red lines that refer to google.com? If so, you may be able to click into the Preview section of the red line to obtain an error message returned from Google. Most likely, the message will refer to an ‘invalid origin’. If you can’t obtain a message, please proceed anyway.
To fix this, you need to go back to the project you created in Google Developers Console when you first set up the plugin.
Under APIs & Auth (from the top-left three-bars menu), click the Credentials tab, then click into the OAuth 2.0 ID that you would have created. Inside, there is an Authorized Javascript Origin setting. You need to update this or add further URLs to match every possible URL for accessing your site – including http and https versions of your site URL, and also with/without the www at the front if it is possible to access with and without (although we would recommend choosing a canonical URL and have all others redirect to that URL).
In all cases, please just get in touch if you prefer for our support team to take a look, ideally providing an account on your site registered to [email protected] that will have permissions to ‘Add Google File’ in a new page/post.
Most users cannot see my embedded file
The Google viewer needs to have permission to show the file to whichever Google user is logged into the browser. The easiest way to ensure this is the case – and so even users who are logged out of Google can see the file – is to locate the file in Google Drive and click Share. Under ‘Advanced’, change to ‘Anyone with the link can view’ to be sure all users can see the file.
I don’t want users to need their own Google account to view folders – they keep being asked to authorize
(Enterprise version of Google Drive Embedder)
See our tutorial here for ensuring users do not need their own Google account to view files and folders.
I want users to grant Drive access at ‘Login with Google’ so they aren’t asked again when using ‘Add Google File’
By default, when you install the Google Drive Embedder plugin, whenever users ‘Login with Google’ to the site they will no longer be asked to grant Drive and/or Calendar permissions (as of Google Drive Embedder version 4.1).
This works well, especially if most users won’t need to interact with the Drive plugin, but they will then be prompted to grant permission for Drive access when they first ‘Add Google File’ to a post, or view in Enterprise-style embedded folder in Drive mode.
It is possible to prompt the user to grant access at the login stage instead by adding this code to your own plugin or your Theme’s functions.php file:
function dd_my_gather_scopes($scopes) {
   return array_merge( $scopes,
      Array(
        'https://www.googleapis.com/auth/drive',
        'https://www.googleapis.com/auth/drive.install',
        'https://www.googleapis.com/auth/calendar.readonly'
      ));
}

add_filter('gal_gather_scopes', 'dd_my_gather_scopes', 20, 1);
Note if you are using the free version of Google Drive Embedder, you would only need the read-only Drive scope so use the following Array instead: Array( ‘https://www.googleapis.com/auth/drive.readonly’ )
Attachment Folders
Attachment Folders
It is possible to have Drive folders auto-created for each page/post and appended to the bottom of the page. These can act in similar ways to controlled folders, but are associated automatically with the post (or page), and are created in Drive in a special hierarchy.
To get started with Attachment Folders, we will need to visit the Drive Embedder plugin settings (in WordPress admin, go to Settings -> Google Drive Embedder) and ensure everything is configured in the Setup tab. See Enterprise Setup instructions for details.
Inserting an Attachment Folder
There are three different ways to embed an Attachment Folder on a post:
- Check Automatically append attachments folder on post in the Folder Controls tab of Settings -> Google Drive Embedder. Then every post will have an Attachments area added to the bottom when viewed.
- Look for the ‘Drive Attachments Folder’ box on your post editor page. Change the Automatically append Drive attachments folder dropdown to ‘Yes’. If set to ‘Default’ then the folder will show only if the global setting is checked (as in the last bullet point). If set to ‘No’, it will not appear even if the global setting is checked.
- Insert the shortcode [google-drive-folder] in the post text, without any id or cfid parameter.
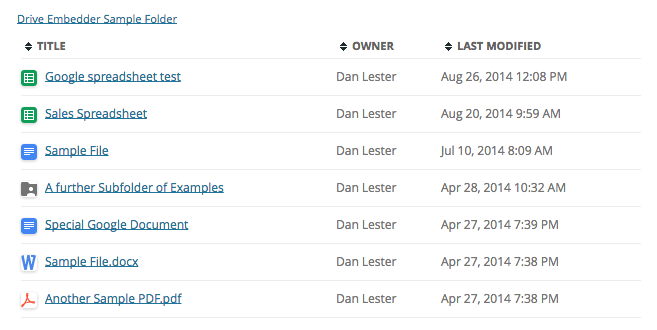
Now, go to the post and you should see a Drive Attachment section at the bottom – where your users can share files with each other (if they have permissions, of course).
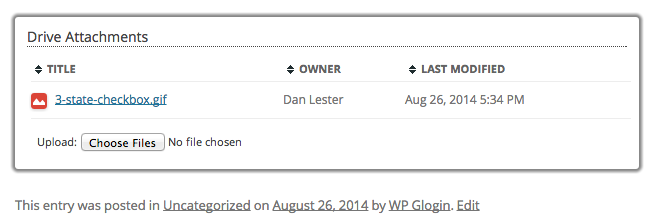
Try dragging a file over that section and see if it will upload for you. Then go to the folder in Drive and see the file there, in a folder named after the post itself, within the Drive hierarchy created for your site.
The great thing about Drive is that files can be in multiple folders at once. So files stored elsewhere in Drive can also be attached to the WordPress folder’s hierarchy and appear at the bottom of relevant pages.
Permissions
The same permissions can be set for Attachment Folders as they can for Controlled Folders. That is, you can specify how users of different WordPress roles can interact with the folder. The permissions are set in the ‘Drive Attachments Folder’ box on your post editor page. You will only be able to see the settings if you are an admin, or if ‘Allow content authors to override attachment folder permissions’ is checked in the Folder Controls tab of the plugin settings.
By default, the permissions will all be set to Default meaning they inherit from the global plugin settings’ Folder Controls tab.
See Controlled Folders for more details about role permissions.
Controlled Folders
Controlled Folders
To make full use of Controlled Folders, you will first need to ensure you have a Service Account configured in Google Apps Login settings – see here for instructions.
Controlled Folders are Drive folders specially registered with Drive Embedder so that it can control who can view or make changes on behalf of the Service Account owner. Only WordPress administrators should be allowed to register them (or you can give the ‘manage_control_folders’ capability to other roles if you like).
Click Add Google File when editing a page/post and locate a Drive folder again. Select Embed, and then click Options…

Choose Register a Controlled Folder, and (after we’ve explained more about them) pick some permissions if necessary.
Different permissions can be applied to different types of user – Logged-in Users and Visitors (who are not logged in) are the groups you will see by default. You can also click Add Role to specify permissions to apply to users in specific WordPress roles.
Permissions dictate what a user/viewer can do with your folder. Initially, all will be set to ‘Default’ which means that the actual permission will be specified in some site-wide global settings (you can see how to set those up here).
The basic options (beyond Default to defer to the global settings) are Always, Drive, and Never. And these can be specified for each functionality ‘View’ existing files and ‘Upload’ new files.
- Always means that users will be able to perform that action by using the Service Account – meaning they don’t even need to have a Google account themselves at all! This way you can allow users to view folders (and even upload files) to a folder that they wouldn’t otherwise have permissions to access at all.
- Drive will defer to the permissions of their Google Drive account, requiring them to e.g. login to Google to view your folder – and of course only be able to see files if they have been given access in Drive itself
- Never – means they won’t be given the opportunity to perform the action at all, via the Service Account or even via their Drive account. However, please note that if they do actually have permission to e.g. view or upload to the Drive folder directly, then they could always just go to Drive to perform the action there instead.
 When you click Insert File a Controlled Folder will be registered and inserted into the post. You can change the permissions from your WordPress Admin panel – look for Controlled Folders in your Dashboard, and you will see a list of all registered Controlled Folders. You can click in to edit permissions for the folder if you didn’t set them as desired when first inserting it into the post.
Embed Folder
iFrame Embedding (Premium version)
In the premium version of the plugin, you can embed a basic view of a Drive folder, but this does not offer any of the interactive functionality available in the Enterprise version. For example, clicking on a sub-folder will open up in a new browser tab.
To embed a folder in the Premium version, click Add Google File when editing a post, locate the folder you want then select the ‘Embed document’ option before clicking Insert File. The process is the same as for a file – see Add Google File for details.
Enterprise Folder Styles
Drive Embedder Enterprise has all the features of the premium and basic versions, plus much more advanced folder embedding. This starts with much neater styling. Instead of embedding folders as iframes, they are built directly into your WordPress pages, meaning you can click into subfolders and preview files without leaving your website.
There are three new types of embedded Drive folders:
- Quick Folders – just like the premium/basic version, you can use our dialog box to locate your folder and drop straight into your post or page, automatically using the new styling and interactive functionality.
- Controlled Folders – only available for admins to register by default, you can select a Drive folder to embed in your post/page with extra control over which WordPress users can interact with it. You can allow all users to view the folder and upload their own files – even without a Drive account; you can defer to the sharing settings for that folder in the user’s Drive account; or you can completely hide the folder or allow different permissions based on their WordPress role.
- Attachment Folders – every page and post can effectively have its own ‘controlled folder’ automatically created and inserted at the bottom of the page for users to view or share files. These auto-created folders are built in a hierarchy within your Google Drive, so files uploaded are instantly part of your Drive collection too. And since Drive files can have multiple parent folders, you can even go the other way round – from Drive, choose a file and instantly attach it to a page/post in your intranet simply by moving it to the relevant folder in the hierarchy!
Quick Folders
When editing a page/post, you should see an Add Google File button. Click it to see the dialog box, and locate a folder you want to embed. The default will be a Quick Folder anyway, but you can confirm this by opening up Options and seeing that the first option is selected – Require user to sign in to Drive.
When anyone views the post, they should see (after clicking Authorize if prompted), a new style folder! It should inherit styles from your WordPress theme, and you can style it further using your own CSS.
The other options that were available in the dialog box when you first selected the folder can customize the behavior.
Show Browse button for file uploads will add a browse button to the bottom of the folder prompting users to select their own files to upload to the Quick Folder. Whether or not that browse button is present, users can always attempt to drag-and-drop files into the folder. The upload will only succeed if their Drive account has permissions to write to that folder.
Show trail of subfolder hierarchy – if checked will show a small ‘breadcrumb’ trail of your history if you click into subfolders to view. You can click on a folder name to jump back to an earlier point in the hierarchy. Without breadcrumbs, you will only be able to ‘Go back’ one step at a time.
Add Google File
To insert a Drive file/folder (or Google Calendar) in a WordPress post, in the post editor click the ‘Add Google File’ button above the main text area. This will open a dialog box where you can search for the Drive file/folder you want.
If you see an ‘App is Unverified’ error message please see the explanation here. Any other issues, please get in touch.
Click the checkbox to the left of your file/folder to highlight it, and then pick one of the options presented beneath it, before clicking ‘Insert File’ to add it to the post.
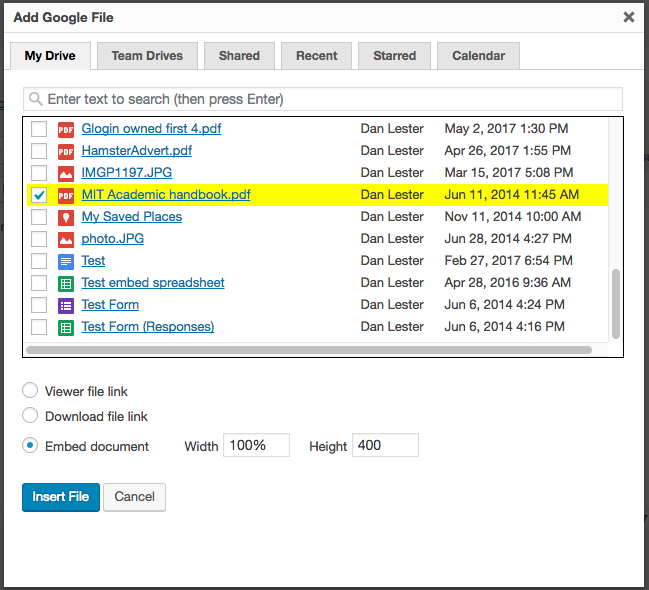
(In the free version, there will be no checkbox next to the file name – just click its title. In Premium/Enterprise versions, check the checkbox to select the file for insertion; click on the filename to preview a file, or to dive into a folder.)
Viewer file link
This option inserts a simple link to open the file in Drive. There is a checkbox option to display an icon to the left of the link in your post, and another option to open the file in a new tab instead of replacing the current tab.
Download file link
This will appear very similar in your post to a ‘viewer file link’ (and the option to add an icon is also present), but the file will download direct to the user’s computer instead of opening to view within the Google Drive website. This makes sense for non-Google file types (such as PDFs), but since Google docs such as Sheets cannot be downloaded directly, you will need to select an export file type for those documents. For example, Sheets can be downloaded as Excel XLS, and Google Documents can be downloaded as DOCX or PDF. (Export of Google docs is only available in the premium or enterprise version of the plugin.)
Embed Document
To embed a document directly in your post to be viewed inline, use the Embed document option.
You will be able to enter a width and height (in pixels, or use ‘100%’ to match the parent container width).
If the file does not seem to have the Embed Document option available, you may need to increase sharing settings within Google Drive to ‘anyone with the link may view’, or higher.
To embed Google Drive Folders you will require the premium or enterprise version of the plugin. You will be notified if that is the case for your selected folder. There are many extra options when embedding folders in the relevant plugin versions – see more here.
How does the plugin respect Google Drive sharing settings?
Google Drive Embedder will show different behavior depending on your document’s type and its sharing settings within Google Drive.
Generally, we recommend setting files’ Sharing settings to at least ‘anyone with the link can view’, in order for them to be visible to all visitors.
You can use lower sharing settings (e.g. share only within the organization, or with specific users), but in that case you will need your users to be logged in to a Google account that is authorized to view the content (otherwise, they will be told they do not have permission).
When using ‘anyone with the link can view’, you must understand that any visitors to your WordPress site will be able to obtain that document’s link and potentially open the document outside of your WordPress site.
Drive Navigation
The Premium and Enterprise versions have advanced functionality for locating the files you need. In addition to being able to search through the search box, your files/folders are organized by tabs across the top. These include My Drive, Team Drives, Recent, and Starred. These tabs are similar to the tabs on the left-hand side in the Drive website itself. To browse My Drive for example, click the name of a folder to explore the files inside that folder. Click on a file’s name to see a preview. To embed a file or a folder, select the checkbox to the left of its name, choose the options that you want from the area below the file browser, and then click Insert File.