Setup (all versions)
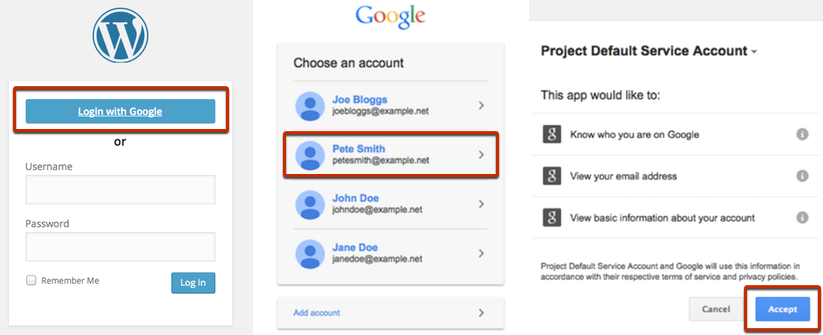
Welcome, and thanks for downloading the Google Apps Plugin for WordPress. We presume you have installed one of the Free, Premium, or Enterprise versions of the Google Apps Login plugin and are now attempting to configure the plugin from the ‘Google Apps Login’ page under ‘Settings’ in your WordPress admin area. We will guide you […]
Login button
Adding the ‘Login with Google’ button to any page on your site The easiest way to add a Login with Google button anywhere on your site is to add the following link anywhere you would like a customer to be able to “Login with Google”: /wp-login.php?gaautologin=true For example, in HTML: <a href="/wp-login.php?gaautologin=true">Login with Google</a> This […]
Theme My Login
If you use the Theme My Login plugin (TML) to create a custom styled login page on your site, please be aware that since TML adjusts the way the login process works in WordPress, plugins like Google Apps Login that are expecting WordPress standards may not work. An approach that will not disturb WordPress’ standard […]
Troubleshooting
When a user tries to Login with Google, it says “user is not registered in WordPress” The free version of the plugin allows existing WordPress accounts to login using Google credentials, but it will not create accounts if they do not already exist in WordPress. I presume there is no WordPress account with the email […]
Enterprise Multisite
If you are using Google Apps Login Enterprise version on a WordPress multisite installation, please get in touch with us. We have an extension plugin available that will allow you to override Group Role Rules on a sub-site basis. Domain Control tab – multisite options In a multisite installation, there are two extra settings on […]
Multisite
Advanced instructions for WordPress Multisite installations By default, all logins need to be submitted via the root site’s wp-login.php page (since that is the only Redirect URL you were asked to submit to Google Developers Console when you first set up the plugin). That should be fine to get you started, so please just try […]
Advanced Options
Advanced Options You and your users will be able to use Google Apps Login perfectly fine if you simply ignore the Advanced Options section. However, there are two options, plus an extra little trick, that will allow you to customize the exact login flow as you desire. Force user to confirm Google permissions every time […]
Enterprise Setup
The instructions on this page assume you are using the Enterprise version of Google Apps Login and have already followed the setup steps that apply to all versions, followed by the instructions specific to the Premium (and also Enterprise) version which you can read here. This page explains more about the Enterprise plugin’s granular user […]
Premium Setup
The instructions on this page assume you are using the Premium or Enterprise version of Google Apps Login and have already followed the setup steps that apply to all versions, available here. License In Settings -> Google Apps Login (within your WordPress admin panel), click on the License tab. Enter the license key from your […]